Moodle Groups
Introduction
Moodle Groups are useful when you are sharing a module with a colleague and you only want your student group to view your content. In this case, you could place a restriction on some of the module sections. If you want different student groups to take activities at different times or dates, you can use Moodle Groups and restrict access to your Moodle Quiz or Assignment etc..
How to use Groups
You can use groups at Module level but we recommend using groups at the Activity level, this gives you more control over placing restrictions and overrides in place with activities such as Quizzes and Assignments.
Creating a Group
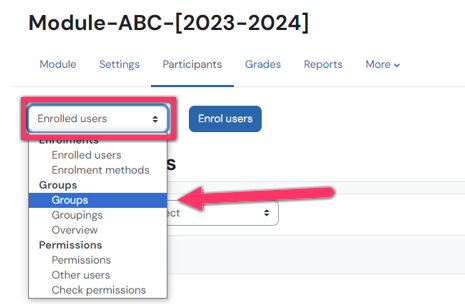
Setting up groups is fairly straightforward in Moodle, you can do this by going to 'Participants' then in the top right you should see a small cogwheel click on that then click 'Groups', now you can create a new group.
Add or Remove People
To add or remove people from a group, just click on a group name and then you should be able to add/remove students, you can search for students by student number if you have it (you can see it from participants list) or you can search by name.
Note: we would recommend you search for students using the student number, which can see in the participant's lits.
Now that you have groups set up you can restrict access to either sections or activities inside sections, if you restrict a section then only people in the group get to see that section, other users don't even see the section on their page.
Technical Support
If you have a Moodle query or need technical support or advice, please send an email to moodle@setu.ie. We operate a helpdesk from Monday to Friday 9:00 am to 5:00 pm.
If you have a password issue, you will need to send an email to the computer services team at computerservices.wd@setu.ie.
If you have a registration issue, please contact the registration team at registration.wd@setu.ie.
Steps
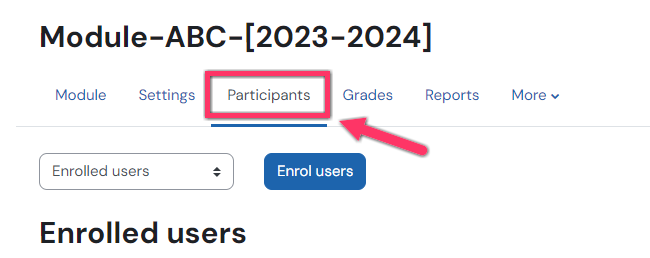
Step 1 - Navigate to the participant's list on your module page.
Step 2 - click on the dropdown where it currently says Enrolled Users and select 'Groups', now you can create a new group.
Step 3 - Click on the Create Group button
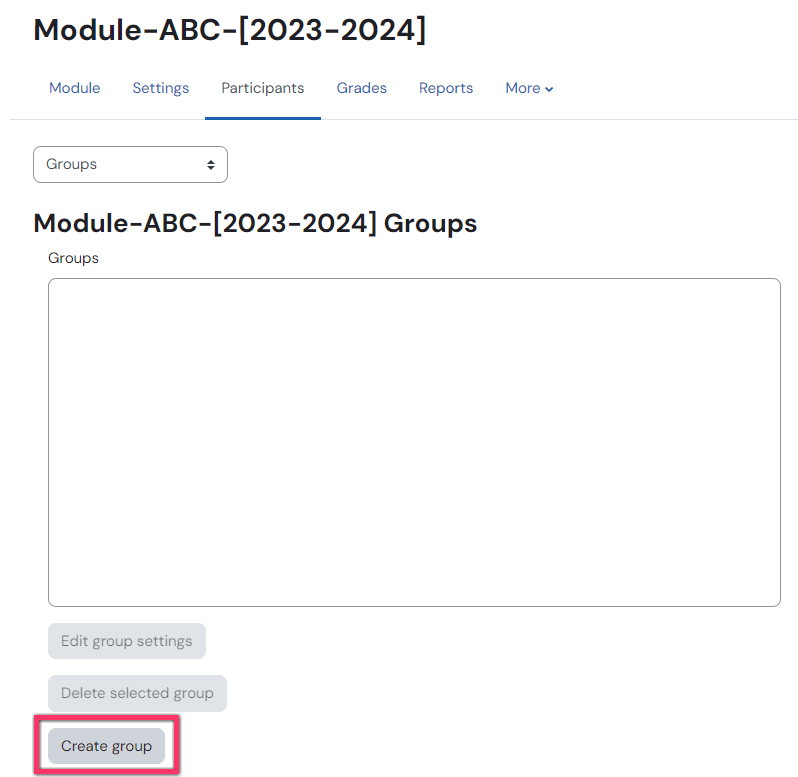
Step 4 - give your new group a name and save you changes

Step 5 - Now that you have your group created you can now add or remove people from the group - click on the group then click add/remove users

Step 6 - Search for the students by using their student number OR just add the student from the list
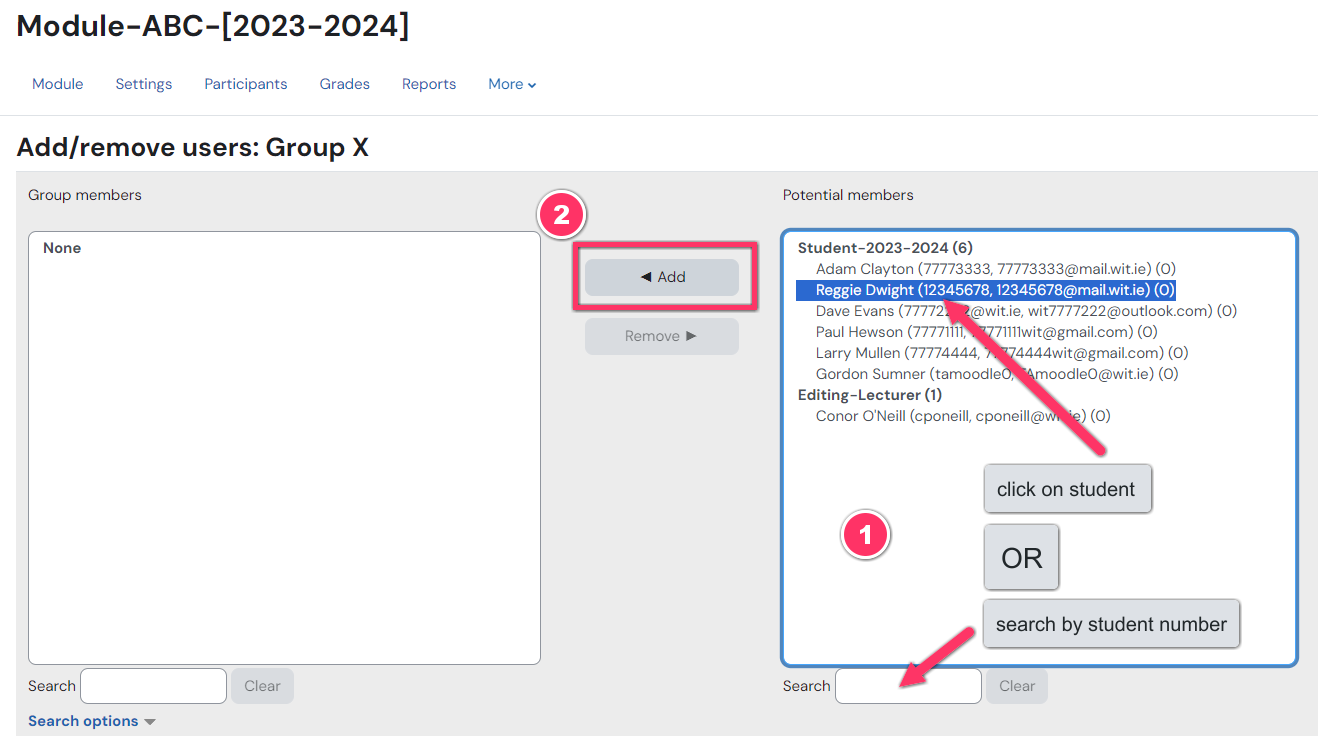
Note: the reverse applies if you want to remove a student